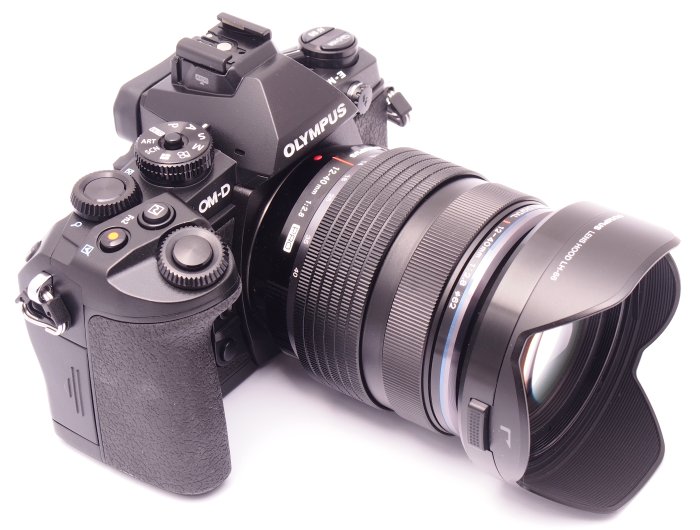
The Olympus OM-D series E-M1 is the first Olympus Micro 4/3 camera targeted to professional and advanced
amateur photographers. It was introduced in 2013 and seems to have been well accepted by advanced and
professional photographers. It includes highly configurable settings, a relatively large number of
physical controls, metal-alloy body and weather sealing. A "Pro" series of Olympus Micro 4/3
lenses designed to match the capabilities of this camera (but usable also on all other Micro 4/3 cameras)
is slowly being introduced by Olympus. So far this series includes only one available model, shown in the
figures, and three more planned.
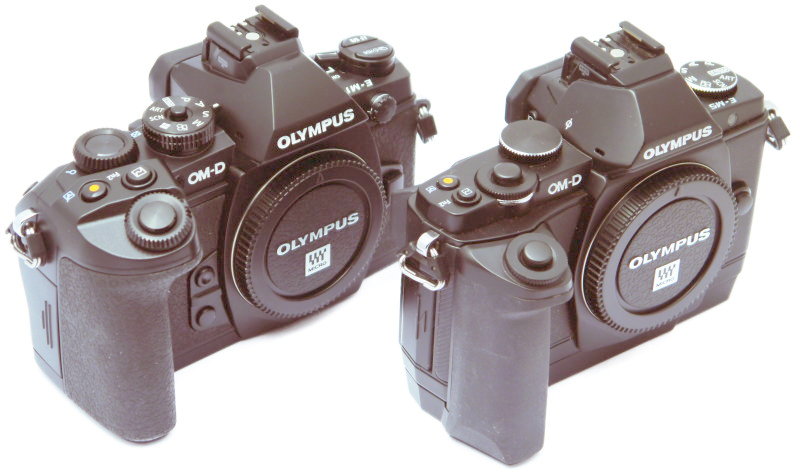
Olympus E-M1 versus E-M5 with half HLD-6.
The E-M1 is a bit wider than an E-M5 equipped with half of the HLD-6 battery grip, but the E-M5 in this
configuration is a bit taller than the E-M1. Volume is about the same. Weight of E-M5
with half grip is 528 g versus 497 g for the E-M1 (yes, the E-M1 is slightly lighter).
This is a fair comparison because I cannot securely hold the E-M5 in my right hand without this grip.
There are third-party grips available for the E-M5, but they force the right index in an uncomfortable
position to reach the shutter release button and front dial.
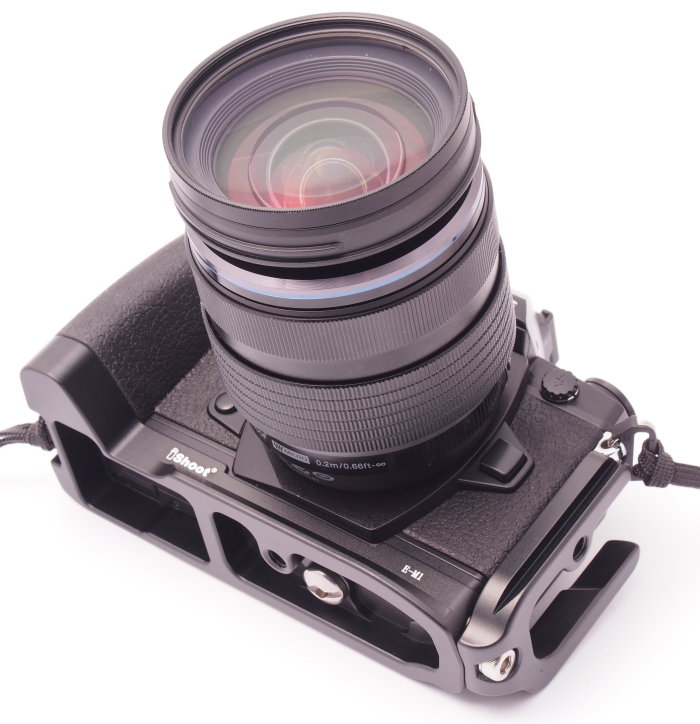
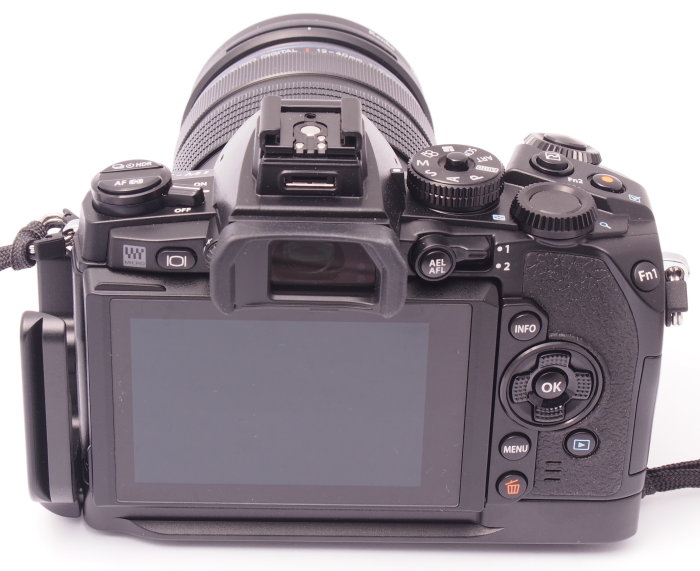
Olympus E-M1 with iShoot Arca-compatible L-bracket.
Holding the E-M1 is a pleasure, except that the built-in grip is a little short in the vertical direction
for some people's hands. I found a solution in a third-party Arca-compatible L-bracket, branded iShoot
(above) that extends the height of the body just enough to provide a home for my little finger. With this
bracket, the E-M1 is probably the best combination of comfortable holding, reasonable weight and ease of
attachment to a tripod head among all the cameras I owned or used. Cosmetically, this bracket fits very
well, and looks more like an integral part of the camera than an add-on. The vertical portion of the
bracket can be removed by unscrewing a single bolt. The battery door at the bottom of the camera still
opens fully, and movements of the rear LCD are unimpeded. The rubber doors on the left side of the camera
are more difficult to open than without a bracket, but can still be operated reliably.
This bracket has on its right side an attachment slit for a camera strap (above). It is probably meant to
attach a hand or wrist strap, but I use it for the neck strap instead. The result is that the camera sits
against my chest with the lens pointing downward and the rear LCD facing upward. This reduces the risk of
banging the front lens element against other people in a crowd and getting it dirty, as well as scratching
the LCD by rubbing it against buttons or zippers of my clothing. When I lift the camera to my eye, the
strap remains out of the way on the right side of the camera. Operation of the card door is also easier
now that the strap does not hang across it. It would be possible to remove the vertical portion of the
bracket and use its bolt for the same purpose on the left side of the camera.
The E-M1 improves on the E-M5 in several significant respects. Numerous reviews
are available if you are interested in a complete rundown of all features, for example on
dpreview. Therefore, I don't need to
repeat these reviews, and can concentrate on the improvements that are especially significant to me. The
following list is therefore not complete, but only a selection of what I think is most important.
Dual autofocus (AF) system. In addition to contrast-based focus detection, which is the typical AF
system used so far in Micro 4/3 cameras, the sensor of the E-M1 contains a large number of
phase-detection sensels. The numerous advantages of phase-detection autofocus are discussed below.
Built-in hand grip. I found it impossible to use the E-M5 without an added HLD-6 grip. Most of the time,
I actually use only the upper half of the HLD-6 because the lower part (with the extra battery) makes
the camera quite bulky. This means I need to take off the half HLD-6 every time I need to change the
battery in the E-M5.
Focus peaking. The LCD screen or viewfinder can highlight in white (or black) the focused portions of a
live-view image. With scenes containing areas at multiple distances from the camera, this provides an
immediate verification of what is in focus, and what is not.
First-curtain electronic shutter. This feature was introduced in firmware version 1.2. You need to
update the firmware if you have an earlier version. It avoids the closing and reopening of the
mechanical shutter immediately before the exposure, but can only be used with exposures shorter than
1/320 s. Like the E-M5, options are available to introduce a delay between mechanical shutter operation
and the start of the actual exposure, which allows vibrations to die off before the exposure starts. My
use for these features is mostly when shooting photomacrography or photomicrography.
Wireless remote control with a mobile phone, via WiFi and a free Olympus app. Since I always carry a
phone anyway, I no longer need to pack a wired remote shutter control. The app also allows the phone
screen to be used for viewing the live-view image and control the camera with touch-screen commands
similar to those available on the camera itself. Image transfer to the phone via WiFi is also possible,
but very slow.
Additional hardware controls. In total, the E-M1 provides 21 buttons, 4 dials and 2 levers versus 14
buttons, 3 dials and 1 lever on the E-M5 (including shutter release, lens release, locking button of the
Mode Dial, diopter adjustment and the composite 4-arrow button at the rear). Most controls are
reconfigurable to change their function. Each re-configurable button potentially saves immersions into
the menu (or Super Control Panel, which I prefer to the menu). The new lever control (located around the
AE-Lock/AF-Lock button) works like a Shift key for a few other buttons and dials, effectively doubling
their range of functions. Some of the E-M1 buttons give a modest positive tactile feedback when pressed,
while others are mushier than I would like. As a whole, they are larger, more in relief, and better than
the E-M5 buttons, but improvement is still possible.
Pre-recorded sets of settings are not new (Olympus calls them Mysets), and make it easier to switch, for
instance, between one set for everyday photography and a second set for flash macrophotography. In the
E-M1, Mysets can be assigned to any position on the mode dial, and this makes it unnecessary to dive
into the menu to switch among Mysets. This effectively turns the E-M1 into a multiple-personality camera
that can replace two or more specially configured bodies. Nothing beats a mechanical dial like this for
ease of use. We all know that freedom is not free, and in this case the price of freedom is that you can
reconfigure a Mode Dial position to produce another mode than indicated on the dial. For example,
nothing prevents you from reconfiguring the P position with a Myset that sets the A mode instead, or to
configue a button to set a Myset that switches to another mode than indicated on the Mode Dial. The LCD
screen/viewfinder of course displays the current Myset, but it is just one of a dozen icons displayed
all around the live view.
In-camera HDR is available, and unlike other specialized shooting modes it is easily accessible through
a dedicated (but reconfigurable) button-and-dial setting. It is limited to two "strengths" and
to a sequence of three shots, but it works and has some practical uses. It is of course safer to use the
camera on tripod when shooting HDR, but the E-M1 shoots the three frames in quick succession and,
coupled with image stabilization, this makes it possible to shoot HDR hand-held if there is plenty of
light. The traditional way of using bracketing and doing the HDR in post-processing is also available,
and allows higher numbers of shots and broader exposure choices.
Stereo microphone input jack. This should be an obvious necessity in a camera that can shoot video, and
the E-M1 has one. The E-M5 doesn't, and has to use the EMA-1 accessory, which takes up the hot shoe and
leaves nowhere to fasten a microphone to the camera.
Autofocus
A combination of phase-detection and contrast-detection autofocus is the single most important improvement
of the E-M1.
DSLRs (and modern film SLRS before them) contain a number of mirrors and prisms. The main reflex mirror
sits in front of the sensor and directs light to the optical viewfinder, where the image is righted by an
optical pentaprism that gives the camera its typical shape with a viewfinder "bump" atop a
brick-like body. The main mirror is semi-transparent and some of the light passes to a secondary mirror
located behind the main one. This secondary mirror reflects light to a single-chip device carrying
multiple autofocus sensors. Exposure sensors are also present, but their placement can vary.
The sensor has specialized sensels that record only light coming from one specific direction, and
therefore a set of complementary sensel-pairs records an image coming from the left direction and one
coming from the right. Typically, phase-sensitive sensels are arranged in a line (with one subset of
sensels "looking to the left", the other looking to the right), and therefore the output
consists of two lines, or one-dimensional images. If the subject is correctly focused, rays coming from
one region of the subject and passing through different regions of the lens (for example the right and
left sides of the lens) are focused on the same region on the autofocus array of sensels. The two images
recorded by the two subsets of sensels in this case seamlessly overlap. If the subject is out of focus,
instead, the two images are shifted sideways (i.e., out of phase) with respect to each other. The camera
electronics detect the difference between "left-looking" and "right-looking" images,
and compute the direction and amount of offset between the two lines. Based on this data, the lens is
refocused in the necessary direction and by a computed amount. The process continues during focusing,
until perfect focus is achieved, typically in a fraction of a second. Overshooting the focus position
normally does not happen, because focusing speed can be slowed down as the system detects that perfect
focus is approaching. This is the basis of phase-detection autofocus. In poor lighting conditions, with
slow lenses, or with subjects that lack detail, focusing may results in focus "hunting" back and
forth.
Once autofocus is achieved, the main and secondary mirrors are lifted, the shutter opens and the image is
recorded. Advanced cameras may recognize during autofocus that they are tracking a moving subject, and
continue to focus predictively during the time taken by the mirrors to lift and shutter to open.
Usually, a phase-detection autofocus sensor has rows of phase-sensitive sensels that can detect a phase
shift in the horizontal direction. This works best with subjects that have points or vertical/oblique
lines of high contrast. This type of sensor cannot detect phase shift in a subject that only has
horizontal, parallel lines of contrast. Advanced phase-detection autofocus sensors have also vertical
columns of sensels, to sense phase differences also in this case.
Since phase-detection autofocus relies on light passing through opposite sides of the lens, low-speed
lenses do not provide light pathways sufficiently diverging from each other. Generally, phase-detection
autofocus can work reliably with f/5.6-6.3 or faster lenses.
Mirrorless cameras, as their name implies, have no main and secondary mirrors. Until a few years ago,
these cameras could only perform contrast-based autofocus, which relies on the detection of sharp borders
between light and dark areas of the image recorded in live view by the same sensor used to record images.
This method provides no indication of the required direction of focusing, so the camera has to try one
direction first, and if focus get worse it reverses and focuses in the opposite direction. There is a
fifty-fifty chance of starting in the wrong direction on the first try. Autofocus may have to reverse
again if it overshoots the correct focus and has to backtrack. Sometimes it overshoots and reverses
multiple times if the subject does not have areas of sharp contrast. A further problem is that the live
view image is recorded as successive, discrete frames rather than continuously, and focusing may have
enough time to overshoot between frames, especially in poor illumination that increases the time interval
between frames. On the other hand, contrast-detection autofocus is in principle not limited by lens speed,
and with subjects that contain a lot of fine detail it can potentially be more precise than
phase-detection autofocus.
Contrast-detection autofocus has substantially improved over the years, but not to the point of equaling
the speed and immunity to hunting of phase-detection autofocus. The Olympus E-M5 is an example of good
contrast-detection autofocus. The main limitations of contrast detection (no indication of which direction
of refocusing is needed, and how far is perfect focus from the starting position) seem to be unavoidable
without some type of phase detection. Short of putting a mirror back in the camera (which was done in some
Sony cameras), until recently there seemed to be no way to add a phase-detection sensor to a mirrorless
camera.
The Bayer sensors used in most digital cameras have two green-sensitive sensels for each red- and
blue-sensitive sensel. Therefore, one might think of using some of the "extra" green sensels for
a different function, specifically, phase detection. This leaves a "hole" in the recorded image,
which can be made to disappear with the same type of in-camera processing used to make defective sensels
and "hot pixels" disappear. As long as there is enough processing power available, and the
sensor has a sufficiently high total number of sensels, even entire rows and columns of missing pixel data
can be made invisible. In the E-M1, 6.25% of the sensels are dedicated to phase detection. This does not
mean that the image produced by the sensor is 15 megapixel instead of the declared 16, because the missing
pixel data is interpolated from neighbor sensel data. In addition, phase detect sensels are always spaced
4 sensels away from each other, both vertically and horizontally, and as a result only 1 out of 8
green-sensitive sensels is "missing". In the sensor of the E-M1, phase detect sensels are
overlaid by a prism-shaped microlens instead of a convex one like ordinary sensels. There also seems to be
no color filter on autofocus sensels.
The E-M1 has phase-detection sensels that look left or right, but not up or down. Therefore, it cannot
autofocus by using cues from horizontal features of the subject, and the camera may need to be inclined
sideways or turned by 90° to autofocus on very unusual types of subjects that have no vertical or
oblique features. Just remember this in the unlikely case it should happen to you. The trade-offs of this
type of sensor are well worth the improvements in autofocus performance. The E-M1 can autofocus with 4/3
lenses (via an adapter) almost as fast as Olympus 4/3 DSLRs do, while all earlier Micro 4/3 cameras are
painfully slow with these lenses. As a whole, the E-M1 cannot yet compete with professional-class DSLRs in
autofocus speed, reliability and tracking capabilities, but seems to be better than many consumer-class
DSLRs. It is also competitive with some of the professional DSLRs of a few years ago.
This does not mean that the E-M1 will autofocus at blinding speed with any lens and in any light
condition. With the Olympus 60 mm macro, for instance, there is still quite
a lot of focus hunting and racking the lens back and forth (although normally not more than once). The
same thing happens with all DSLRs I used, which is quite natural because in a macro lens the focusing
range is so wide that, even with focus-limiting activated, the subject is so badly unfocused that neither
phase-detection nor contrast-detection find anything to lock onto, and the camera must rack the lens all
the way out and in before it can finally find something to focus onto.
A limitation of the E-M1 is that it cannot use its most peripheral phase-detection sensels with 4/3
lenses, perhaps because these lenses are designed for a higher distance between rear elements and sensor,
and therefore phase-detection sensors that, for instance, "look left" and are placed near the
left edge of the sensor see no light coming through 4/3 lenses. This is quite possibly a limitation of 4/3
lenses, rather than of the E-M1. The E-M1 has also other restrictions on the use of phase autofocus in
certain operation modes, which may be due to limitations in processing power and, in future cameras, could
be removed by multiple processors working in parallel.
Newer types of sensors, some of which are already used in Canon cameras, place a pair of complementary
phase-detection sensels, or even four of them (one horizontal pair and one vertical pair) in place of a
single green sensel. These sensors increase the number of autofocus sensels and make their output
potentially usable for imaging in addition to autofocus. I expect fast improvements in imaging sensors
with built-in phase-detection in the near future, with the potential of matching or exceeding the
performance of dedicated phase-detection sensors of DSLRs. When this happens, there will not be any point
in using the new sensors in large, heavy, mechanically and optically complicated DSLRs, which eventually
will be replaced by simpler and cheaper mirrorless designs. Nikon and Canon should better take notice
before it is too late.
A consequence of phase-detection integrated in the imaging sensor is that it is no longer possible to
place an anti-aliasing filter in front of the sensor, and therefore anti-aliasing has to be done by
in-camera post-processing, in connection with demosaicking. This is another example of shifting more and
more camera functionality from hardware to software, and of the increasing importance of powerful
in-camera data processors. As a result, "raw" image files may receive more and more in-camera
post-processing, making them more and more different from the original concept of just storing the
unaltered data collected by the camera sensor.
Autofocus
types in the E-M1
It is not possible for the user to choose which AF type is used by the E-M1. The following is my current
understanding of which AF system the E-M1 chooses to use in different circumstances:
With native Micro 4/3 lenses and Single AF, the E-M1 uses only contrast-detection AF. This is the AF
type in which also other Micro 4/3 cameras perform well, and Olympus improved it further in the E-M1.
Apparently, the design decision was that phase-detection AF in this case would not further improve the
AF performance.
With native Micro 4/3 lenses and Continuous AF, the E-M1 uses a combination of contrast- and
phase-detection AF. Continuous AF is the mode in which other Micro 4/3 cameras perform poorly, and the
E-M1 improves it by adding phase-detection. In low light, however, phase-detection is switched off and
only contrast-detection is used.
With 4/3 lenses, the E-M1 uses phase-detection AF both in Single and Continuous AF modes, but the number
of phase-detection areas is reduced to a diamond-shaped zone. Contrast-detection AF is not used, except
possibly in low light (I am not certain of this, though). These lenses are designed for phase-detection
AF and are known to AF very slowly with contrast-detection. It can be stated that the E-M1 is the first
Micro 4/3 camera allowing a reasonable use of AF with 4/3 lenses.
More on Olympus E-M1 versus E-M5
As far as I am aware, the E-M1 does not lack any of the E-M5 features that I normally use. The E-M1 also
uses most of the accessories available for the E-M5, including batteries. Exceptions are the HLD-6 battery
grip, third-party L-shaped camera brackets, and some of the camera plates for attachment to a tripod.
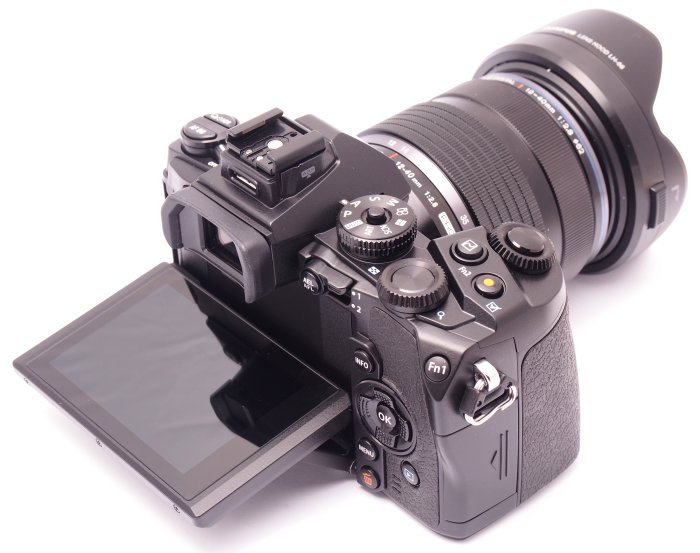
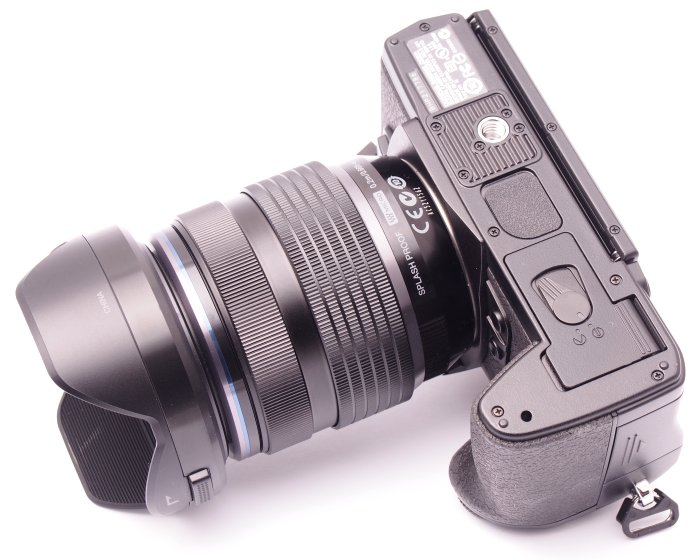
Olympus E-M1 with 12-40 mm f/2.8.
All changes from E-M5 to E-M1 are improvements. However, there are a few points that could have been
improved in the E-M1 but were not addressed, for instance:
The tripod attachment socket at the bottom of the E-M1 is still not aligned along the lens axis, but
offset to one side. I always use a third-party, Arca-compatible bottom bracket that lets me mount the
camera they way I want it in an Arca-compatible clamp (the bracket also happens to have an extra
threaded socket in the right position). However, a correctly placed tripod socket would be an indication
of attention to the detail expected by professional and advanced amateur photographers.
The HLD-7 battery grip can be used to make the E-M1 more comfortable for people with big hands and to
allow longer shooting sessions. However, the camera becomes quite bulky. Like the HLD-6, the HLD-7 must
be removed from the camera to change the internal camera battery, so, in the field, after discharging
the batteries in the camera body and grip, most people only change the battery in the grip and still get
to use only one battery at a time. Both the HLD-6 and the HLD-7 look big enough to be able to contain
two batteries instead of one, so why not do this?
A significant oversight in both the E-M1 and E-M5 is the impossibility of running the camera (without
battery grip) from a mains power supply. The expensive AC-3 mains power supply is available, but the
E-M1 and E-M5 camera bodies have no power socket. The power supply can only be connected to the battery
grips. What is the point of using a battery grip when running a camera from mains?
No software is available to support tethered shooting in a studio environment with automatic uploading
of files to a computer (either via USB or a faster WiFi connection than the one used with smart phones,
which is way too slow) and displaying them on its screen. Clearly, studio shooting was not on the minds
of the Olympus designers.
The E-M1, like the E-M5, still has no built-in electronic flash. An internal pop-up flash like the
E-M10, in command mode, would be great to wirelessly control external flash units. The E-M1 comes with
the same miniature external electronic flash supplied with the E-M5, which works very well in commander
mode but is an extra item to carry around and mount onto the camera.
There is no way to backup the configuration and Mysets to the memory card or internal memory. Take a
wrong turn in the illogically structured and cryptically labeled Reset/Myset menu, and you will
overwrite a Myset with the current settings instead of activating the chosen Myset. The two operations
are placed on the same menu and only one menu level behind each other. If you accidentally overwrite a
Myset, you are then in for a 10 to 20 minutes dive into the menus to put everything back, assuming you
remember what to do or have written down your choices for each Myset (which is highly recommended). The
Reset/Myset menu also includes the Reset item used to clear out most settings - including of course all
the Mysets. All the more reason to stay out of this menu once you have your Mysets done and assigned to
buttons or dials.
There is no way to rename Mysets, so it is up to you to remember what Myset 1 to Myset 4 do.
The manual is incredibly lacking in information in several critical areas. You simply cannot learn to
configure this camera without the help of one or more independent web sites, including for example the
following (in no particular order). There is quite a bit of repetition among these sites, but one
particular style or level of detail may work better for you. There are plenty of other sites discussing
the configuration of the E-M5 and other Olympus cameras, which are quite similar.
Both the E-M1 and E-M5 have a low-vibration shooting mode (called Anti-Shock by Olympus) that
electronically starts the exposure after a configurable delay of one to a few seconds from the initial
closing and opening of the mechanical shutter. This feature allows shutter vibrations to die out before
the exposure starts, and is especially useful in astrophotography, tripod photography (especially with
long lenses or when a remote control is not available), photomacrography and photomicrography. A present
to E-M1 owners came with firmware version 1.2, in the form of an electronic first-curtain mode that
completely avoids the mechanical shutter movements before the exposure, and therefore eliminates
vibration. To set this mode on the E-M1, set the shutter delay to 0 seconds in the Custom →
Anti-Shock menu. A limitation of this new setting is that it works only for exposure times of 1/320 s or
shorter, which substantially reduces its usefulness. So far there has not been a comparable update to the
E-M5, although this feature has been introduced in firmware updates of at least one lower-end Olympus
camera.
The maximum length of time-lapse sequences is much greater in the E-M1 (999 shots, compared to 99 shots in
the E-M5). It is now feasible to shoot reasonably long sequences to display as high-frame-rate animations.
The E-M1 has a flash hot contact at the front of the camera, missing in the E-M5. The same voltage
limitations apply as for the hot shoe contact.
Several of the physical controls of the E-M1 have been repositioned with respect to the E-M5. This is both
an advantage and a problem. The slightly wider camera body and the built-in grip on the right side allow
the controls on the top and rear panels to be less crowded, but this is not the only change. Button 1 is
now easily accessible and can be found without fumbling. The Playback button is much easier to operate
with normally-sized male fingers, once you you learn its new position.
The HLD-6 battery grip for the E-M5 duplicates the front dial and shutter release button already present
on the body of the E-M5, which is a necessity but makes the controls even more crowded. The built-in grip
of the E-M1 avoids this duplication and consequently is less crowded with controls on its top panel.
Curiously, the rear dial of the E-M1 and E-M5 have no button at their center, which would be an obvious
place for a comfortably large button. The small button at the center of the E-M1 mode dial locks the dial
against accidental turning. I did not miss such a feature in the E-M5, and question its real usefulness. A
configurable button doing something more useful could instead be placed here.
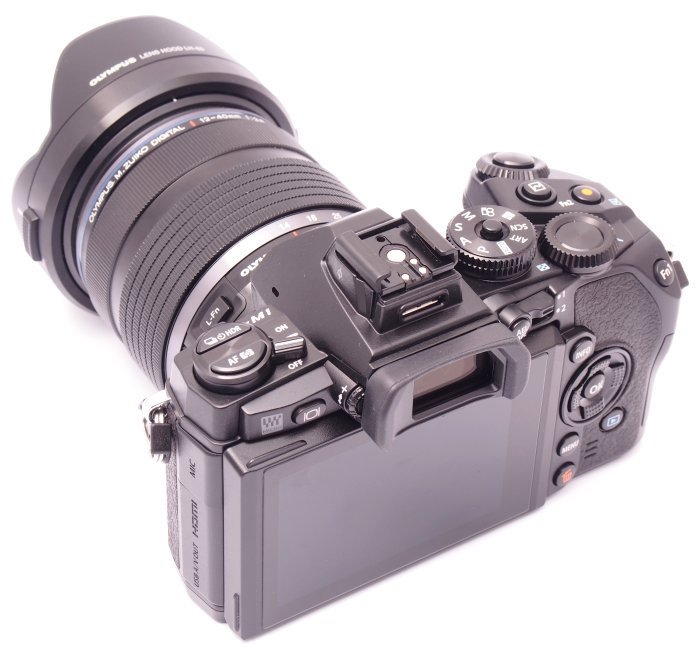
The on-off switch has been moved to the left side of the top panel. This is near the place where a similar
lever was located in the OM-series film SLRs, which is the reason for this design choice (however, the
lever in the OM has additional functions). In the E-M1, the on-off switch is easier to use with either
hand than the awkwardly placed one of the E-M5 (near the bottom right of the rear panel). Olympus should
probably take a hint from Nikon DSLRs in this respect, where the on-off switch is a rotary dial around the
shutter trigger button, easy to operate with the right index in shooting position. It saves a lot of time
and avoids having to move either hand away from their normal shooting position. Some Panasonic Micro 4/3
cameras place the on-off switch around the mode dial, which is placed near the shutter release button and
is easier to reach than in the E-M1.
The mode dial in the E-M1 moved from the left to the right side of the top panel, and in place of the mode
dial of the E-M5 there is now something that looks like the film rewind knob of the old OM cameras. It is
round like a dial, carries two buttons, but it does not turn. Other controls have been moved without
apparent reasons, for instance the button that switches between eyepiece and LCD screen. In general,
controls are easier to operate than in the E-M5, but initially it takes a little time to find them if you
are used to the E-M5.
Olympus E-M1 versus E-M10
The E-M10 is currently the latest addition to the Olympus OM-D line. The E-M10 is slightly smaller than
the E-M5, lacks weather sealing and phase-detection autofocus, and is meant as a simplified and cheaper
model than the E-M5. It is still a capable camera, and a valid alternative on a smaller budget or where a
physically smaller camera is desired but an eye-level viewfinder is still necessary. It is not fair to
compare the E-M10 with the E-M1, because these two models are simply in different classes. The E-M10 could
also be a choice as a second Micro 4/3 body in a kit based on the E-M1, unless one expects to switch
cameras seamlessly and continue shooting without a thought. Both the handling of the body and the
placement of the controls are different, so these two cameras are not really interchangeable. The E-M10 is
definitely not recommended for photographers with big hands.
Olympus E-M1 versus DSLRs
The number, size and comfort of use of physical controls in professional-class DSLRs is still superior to
the OM-D series, in spite of the improvements of the E-M1. The buttons in the Nikon DSLRs I used in the
past are twice the diameter of the E-M1 buttons. I can fit the entire tip of my finger on recessed buttons
of Nikon DSLRs , as opposed to having to extrude the tip of my finger, like toothpaste being squeezed out
of a tube, into the narrow holes housing some of the recessed buttons on the E-M1 and (especially) E-M5.
On the E-M1, the Play button has this problem, and the Fn1 button is also a bit too flush for comfort.
The E-M1 is larger and heavier than most other Micro 4/3 cameras, most of which are just too small for
comfortable holding. However, the difference in size and weight between the E-M1 and a typical DSLR with
metal-alloy chassis remains dramatic. A typical Micro 4/3 kit with high-quality lenses weighs about half
the corresponding kit of an APS-C DSLR, and less than half compared to a full-frame kit. Additional,
dramatic weight savings can be made by using Micro 4/3 consumer-level lenses in cases where top-class
optical performance is not essential.
Olympus E-M1 in a two-body kit
An Olympus E-M5 or E-M10 remains a choice as a second body in a kit based on an E-M1. Disadvantages are
the differences in placement of controls and the much smaller body of the E-M5 and E-M10, difficult to
hold in one's hand without an additional hand/battery grip. The main advantage is that the weight and size
of a second body are not very noticeable in a normal camera backpack. Two Micro 4/3 bodies weigh
substantially less than a single full-frame DSLR body like the Nikon D4.
A second E-M1 would be the obvious choice for a second body if allowed by one's budget, since it adds very
little weight and size with respect to an E-M5 or E-M10, and eliminates the need to cope with different
control positions and software configurations. This solution may be best for action and event
photographers who need to frequently and quickly alternate between two very different focal lengths (e.g.,
telephoto and wideangle).
In some cases, the E-M1 could be accompanied in a kit by a totally different Micro 4/3 body, for instance
one of the Olympus Pens or Panasonic smaller bodies without eye-level viewfinder. This might be useful for
street photography and a few other situations where a camera that looks like a point-and-shoot offers
psychological advantages, or where every gram of weight counts.
Summary
The Olympus OM-D E-M1 is a significant improvement on the E-M5 (and E-M10) in most
respects.
New autofocus capabilities and a larger number of better placed controls are the main advantages over
the E-M5. It is
slightly larger and heavier than the E-M5 but significantly more capable and comfortable to
handle. The E-M1
takes up essentially the same space and weight of an E-M5 equipped with half of the HLD-6 grip.