Panasonic G3 for multispectral photographyUntil recently, I carried out multispectral photography with a modified Nikon D70s DSLR. I am quite satisfied with its performance , and used it recently for scientific work. However, the D70s is an average-sized DSLR, i.e., quite large, especially if carried in addition to an ordinary, non-modified DSLR. In addition, the D70s is quite old, which means in practice that it has a small LCD display and no live view. Both a large display and live view are very useful in multispectral photography. Since I decided to switch to Micro 4/3 for my future needs, it was only natural to update also my multispectral camera to Micro 4/3. In addition, buying a not-too-expensive Micro 4/3 camera and using it, unmodified, for general photography for a few months sounded like a good testing strategy before committing to a better, more expensive Micro 4/3 body. 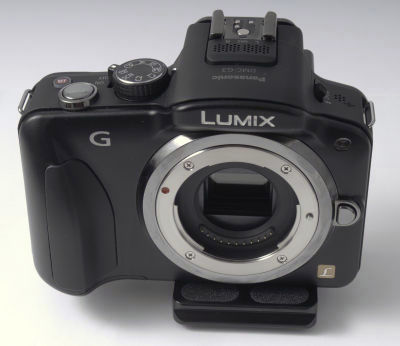
My choice fell onto a Panasonic G3. This model is good enough for serious photography, and in fact provides an overall somewhat better image quality than my old D70s. The image quality of the G3 is closer to the one provided by my Nikon D200. The physical build quality of the G3 feels comparable to the plastic-bodied D70s, except for the obvious technological improvements of the last eight years, including the much bigger LCD screen. The G3 is of course much smaller and lighter than any past and present Nikon DSLR. Further reasons for choosing the G3 for future modification for multispectral photography are the good results in multispectral (especially UV) photography obtained by Klaus Schmitt (http://photographyoftheinvisibleworld.blogspot.com/) with an earlier Panasonic model, and the availability of an online modification tutorial for the G3 at LifePixel. Read their safety warnings before opening a digital camera, and do not attempt this modification unless you are aware of the high-voltage risks inherent in a camera with built-in electronic flash, even when the camera is switched off and the battery taken out. The modification procedure on the LifePixel web site is detailed enough to avoid most of the technical problems likely to arise when blindly disassembling an unknown camera (but not all small details are there). I did not follow the instructions past the disassembly stage, as discussed below, because LifePixel does not sell the G3 replacement window. It only sells replacement windows for DSLR models, and I originally purchased one for my D70s from them. They confirmed to me by e-mail that they will not sell me the G3 replacement window, in a tone that suggests they receive this type of request far more often than they wish to, and that they prefer to make the conversion themselves as it is far more profitable than selling replacement windows. So, this is not an oversight of their web site. By far the most difficult operation in the reassembly of the camera is reinserting the flat cable ends into their connectors. Make sure you understand how these connectors are locked and unlocked. There are a few different types, even in the same camera. Be very careful not to damage the cables and their end contacts. These contacts and connectors are several times smaller than those in a typical personal computer, and meant to be disconnected and reconnected only a couple of times during the camera's life. If something does not work properly after fully reassembling the camera, reopen it, partly disassemble it again to expose all connectors, and verify that the cables are properly seated (I had to do this after modifying the D70s). Their mechanical tolerances are minimal, with individual contacts only a small fraction of a mm wide and sometimes dozens of contacts on a single cable end, and the cables themselves are stiff, springy and easily damaged. LifePixel is based in the US and does make the modification if you send them a G3 camera, but in my case shipment and customs would be a problem because I am located in the EU. The total cost for a conversion would approach the original price I paid for the unmodified G3. Klaus Schmitt reported on his site that the multispectral window originally installed by a European company in his camera was of unsatisfactory quality for UV photography, so not always you get what you pay for. Fortunately, the Micro 4/3 format has a few surprises in store for do-it-yourself conversions (see below). There are three reasons for replacing the IR-cut and antialiasing filter of a DSLR with a corresponding UV- and IR-transparent window. These reasons are not so obvious: after all, it would be enough to simply remove the IR-cut and antialiasing filter to achieve the stated goal. The first reason is that the replacement window protects the sensor cover from dust. Any dust particles that settle on the replacement window are kept at a distance from the sensor, and therefore are more likely to remain unfocused and (if small enough) invisible in images, at least when doing landscape photography. This point is moot in macrophotography and photomacrography, where the depth of focus, which is located at the rear of the objective (while the depth of field is located at the front of the objective), becomes large enough to make any dust particle, even when located a distance from the sensor, visible in images. The second reason is that the window that covers the chip, and cannot be removed, is quite thin and is not designed to be cleaned often (however, its glass is indeed very hard to scratch). This is just an unavoidable fact of life. The third, and most important, reason is that a DSLR is calibrated to provide a correct focus indication in the viewfinder, and a correct autofocus in pictures, with a filter in place in front of the sensor. Remove the filter, and any image that is well focused in the viewfinder is horribly out of focus on the sensor (and in pictures). In principle, if the camera is capable of live view, you could do away with the viewfinder and focus only in live view. My D70s, however, has no live view, so it simply cannot be used without a replacement window of the correct thickness. A Micro 4/3 camera has no optical viewfinder and uses only live view, either in an eye-level electronic viewfinder or on a screen at the rear of the camera, to focus (and also to autofocus, by using special sensels embedded in the sensor chip). Focus indications in the electronic viewfinder/screen, as well as autofocus, remain accurate even after the filter is removed. However, remove the IR-cut and antialiasing filter from a Micro 4/3 camera, and most of its Micro 4/3 lenses can no longer focus at infinity, and instead become somewhat short-sighted. This is an obvious concern for landscape and general photography with the original lenses. The point is moot, however, when using lenses mounted on custom adapters or focusing helicoids, which can be made as short as needed to restore infinity focus, and in close-up photography, macrophotography and photomacrography, where lenses need to be short-sighted anyway. Some camera lenses in ordinary focusing mounts can actually be recalibrated to restore infinity focus. Most lenses for UV photography must be used with custom adapters in any case. It is obvious from the above discussion that a Micro 4/3 camera is perfectly usable (with appropriate lenses) even when its IR-cut and antialiasing filter is simply removed, rather than being replaced with a transparent window. The only potential problems are a somewhat increased likelyhood of fouling the sensor with dust, and a potentially increased risk of scratching the non-removable sensor window when cleaning it. The upside of this modification is that you can afford two cameras modified by yourself in this way, compared with just one camera modified in the traditional way by a commercial company. As the G3 becomes older and is replaced by newer models, its price will certainly decrease, and you may afford replacing the camera three or four times for the price of a single commercially modified G3. My modification of the G3 involves the removal of the IR-cut and antialiasing filter (bluish-green in color and 3 mm thick) and of the piezoelectric dust shaker (much thinner and glued to its plastic frame). I have not tested the optical properties of the piezoelectric shaker. It is obviously anti-reflection coated but colorless. I would not expect it to transmit UV well, but it might be transparent to IR. If you are interested only in IR photography, you could try to leave it in place and provide the same dust protection as an unmodified camera. You will probably introduce four-five dust particles in the space between the shaker and the sensor when removing the filter, and your lenses will still become short-sighted. 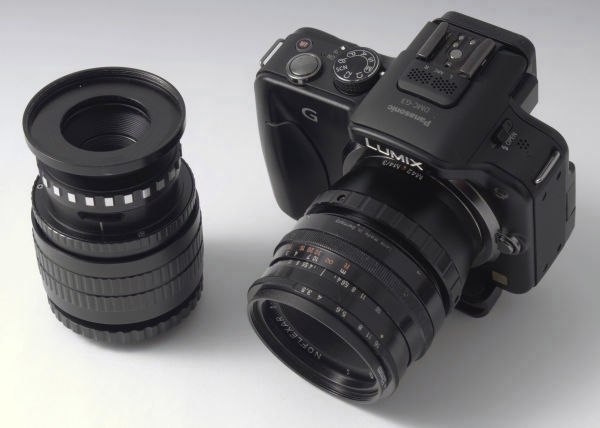
Above are two lenses useful in UV photography with the G3. The UV Rodagon is mounted on an M42 focusing helicoid and a short M42 to Micro 4/3 adapter. This combination is somewhat shy of infinity focusing, which would require a slightly shorter helicoid. The Noflexar 35 mm is mounted on a standard M42 to Micro 4/3 adapter. 
The Noflexar had to be recalibrated for focusing at infinity with the modified G3, which takes only a few screwdrivers and a couple of minutes. This is an interesting lens that exhibits only a very minor amount UV focus shift, performs well also in the IR, and in addition can focus from infinity down to 1:2 with a built-in, four-step variable extension ring in addition to the standard focusing ring. On Micro 4/3, it provides an angle of view equivalent to a 70 mm on 24 x 36 mm format, and the FOV at 1:2 on Micro 4/3 covers the same subject area as 1:1 on 24 x 36 mm format, so one can call it a true macro lens. Its rear element projects slightly behind the lens mount, so it cannot be used on some DSLRs, but this is no longer a problem with mirrorless cameras. 
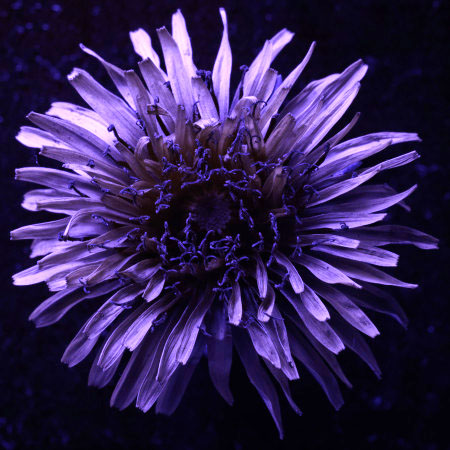
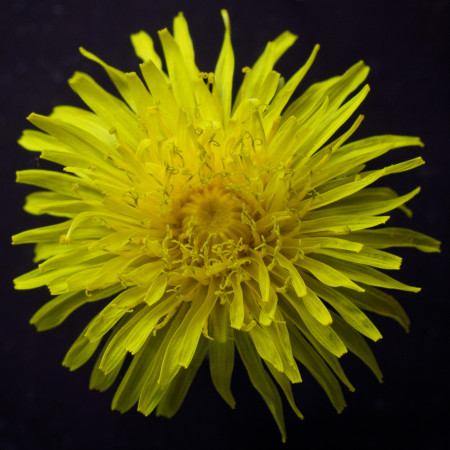


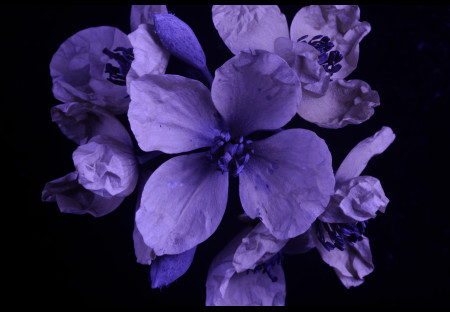
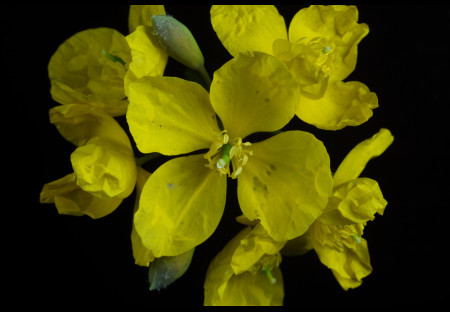
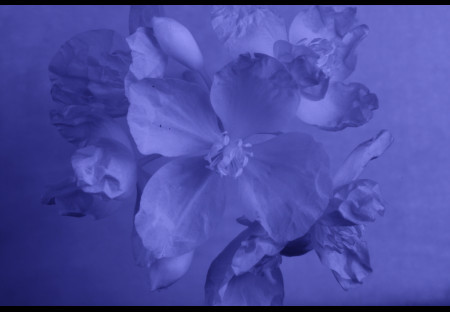
The modified G3 behaves in a way similar to the D70s in terms of image quality. UV sensitivity is probably slightly higher in the G3, and the sensitivity spectrum of the G3 also seems to extend farther into the UV, making it more feasible to experiment with shorter wavelengths. This is primarily visible in the yellow tones of the G3 UV images. The D70s usually does not go farther than a ruddy red. IR sensitivity seems to be slightly higher in the D70s, but is extremely high in both modified cameras. The above images are sets of the same subject shot with two types of UV-pass filters, visible-pass and IR-pass, using a technique I refined recently to produce multispectral images without changing lens aperture, lens focus or illumination type (details in reference #73 here). The same color balance was used in all images, in order to provide a comparison. All images are converted from raw with DXO Optics. For practical use or publication, the color balance would need to be adjusted differently or converted to B&W for each image in post-processing. The first set was shot with the UV Rodagon, the second set with the Noflexar (see above). 

The above samples show the appearance of vegetation in the UV and IR, respectively, in sunlight with the modified G3. Color saturation of the UV sample was substantially increased in post-processing to show the presence of different UV wavelengths, which are recorded as different colors ranging, in order of decreasing wavelengths, from blue to indigo to yellow. The IR sample was converted to B&W. Both images were shot handheld with the Noflexar 35mm. The additional capabilities of the G3 (especially live view and HD movies) are of course usable also in the modified camera. In particular, on a sunny day there is quite enough UV to allow focusing in close-up photography without removing the UV-pass filter from the lens. However, there is not really enough UV to allow hand-held exposures at base ISO. In the studio, a 10W UV LED illuminator (365 or 385 nm, depending on the UV-pass filter being used) at close range is sufficient for framing and focusing, but the maximum zoom magnification for manual focusing is quite noisy. As always, take precautions when using high-intensity UV sources. |