Olympus 7-14 mm f/2.8 Pro for Micro 4/3For several years after its announcement in 2008, the usefulness of the Micro 4/3 system was severely limited by the lack of professional and semi-professional lenses and camera bodies. Almost from the start, Olympus and Panasonic introduced several bodies, as well as lenses in the 6 mm to 300 mm range of focal lengths. Until 2012, the Micro 4/3 system was mainly targeted to the consumer market, with a gradually growing share targeted to video-makers. The market responded well, with Micro 4/3 quickly becoming by far the most popular mirrorless system and starting to put a significant dent into the DSLR market share. Semi-professional quality lenses for Micro 4/3 started appearing only in 2011 (e.g., the Olympus 12 mm f/2), but they were few and restricted to prime lenses in the medium-wideangle to medium-telephoto range. In 2012, with the OM-D E-M5 body, Olympus started a slow (but successful) plan to replace its professional and semi-professional 4/3 DSLRs with mirrorless bodies and lenses of equal or better capabilities. The 4/3 system contained several professional lenses, comparable in performance with some of the best lenses of DSLR brands like Nikon and Canon. Unfortunately, although it was possible to mount these 4/3 lenses, via an adapter, on Micro 4/3 bodies, AF (autofocus) with these lenses was so slow as to be unusable until the 2013 announcement of the Olympus E-M1. With this camera, and with its subsequent firmware upgrades, 4/3 lenses suddenly became usable, although AF was still slower than with native Micro 4/3 lenses (e.g., see my experience with the 50-200). A few 4/3 lenses are apparently still being manufactured, although no new models are planned. 4/3 DSLRs, on the other hand, are no longer developed, manufactured or (I think) sold by Olympus. Panasonic started introducing semi-professional or professional Micro 4/3 lenses in 2012 (12-35 f/2.8 and 35-100 f/2.8), followed by Olympus in 2013 (12-40 f/2.8). Although Panasonic has had a 7-14 f/4 zoom already available among its early Micro 4/3 offerings, and Olympus a more modest 9-18 mm f/4-5.6, the Olympus 7-14 mm f/2.8 Pro had to wait until 2015. Together with the Olympus 8 mm f/1.8 Pro fisheye, Olympus now covers very well (for the first time in Micro 4/3 history) the short end of the wideangle range for Olympus. A drawback of Olympus Pro Micro 4/3 lenses is that they are significantly bigger, heavier and more expensive than their consumer-level counterparts (although still somewhat smaller and lighter than full-frame equivalents). All current Olympus Pro lenses offer an f/2.8 aperture, with the exception of the Olympus 12-100 mm f/4 Pro, which trades away the f/2.8 aperture for an extended zoom range and targets advanced photographers wishing to use just one lens almost all of the time, and the 300 mm f/4 Pro, which targets the hand-held super-telephoto shooting scenario. The Olympus 60 mm macro is not part of the Pro series, but still provides an f/2.8 speed, and in this conforms to the general pattern for modern macro lenses. The Olympus 30 mm macro f/3.5 may be interpreted as compromise between price and specifications. It is the only existing macro lens that goes from infinity to 1.25x, which is equivalent to 2.5x on full frame. It is relatively cheap, and is not a Pro lens either.
What is so special about f/2.8 lenses? 


and Olympus 7-14 mm f/2.8 Pro (right). Mechanical characteristicsThe 7-14 is rather heavy (534 g) and long (108 mm including the built-in, non-removable lens shade). Side-by-side with the Olympus 12-40 Pro, the 7-14 is slightly longer and wider. The 7-14 does not use internal zooming, and the bulbous front group moves outward at the lower focal lengths. The lens shade is an integral part of the lens barrel, and does not follow the outward extension of the front element. This solves the conundrum of lens shades on zoom lenses. Namely, in typical zooms, the lens shade is immobile with respect to the front lens element, and therefore must be designed so that it does not vignette at the lowest focal length. As a result, at the highest focal length, the lens shade is too shallow and does not adequately protect the lens from stray light. As an example, the lens shade of the Sigma 50-500 mm is designed for the 50 mm FL, and is ridiculously short for a 500 mm. In the Olympus 7-14, instead, the lens shade effectively becomes deeper at long focal lengths, and shallower at short focal lengths. This cleverly compensates for the varying view angle of the zoom. The 7-14 has no front (or rear) filter thread. A couple of third-party sources provide accessories to mount large square filters, or a 105 mm round filter, in front of this lens. These filters and filter carriers make the lens front look enormous. Since peripheral light rays with this lens cross a flat filter at a high angle from the normal (over 50°), I would expect a front filter to introduce significant aberrations and corner fall-off on this lens. The lens barrel has a metal focus ring that can be pulled back to engage manual focus, and the programmable L-Fn button present on all Pro lenses. The lens cap is a proprietary LC-79. Two plastic tabs engage the two smaller petals of the lens shade (not the two larger petals as done in other lenses). The cap does not come off unless the two buttons on the sides are pressed. Optical characteristicsThe diagonal angle of view varies from 75° at 14 mm to 114° at 7 mm. Perhaps more telling in practical use is the fact that, with this lens at 7 mm, one can stand in a room corner and simultaneously shoot, with good margin, the three other corners. This means that the horizontal angle of view in landscape orientation is well over 90°. The closest focus distance is 0.18 m, which provides a field of view of 157 x 118 mm. This is a rectilinear wideangle, not a fisheye. Therefore, images do not need to be de-fished, or othervise post-processed to remove fisheye distortions. On Olympus (and likely Panasonic) cameras with updated firmware, the camera takes care of correcting any residual geometric distortion of the lens. If shooting raw, any good raw processing software that includes this lens in its database will do the same. On the web, one sometimes witnesses endless and pointless discussions about the "distortion" introduced by rectilinear wideangles. A correctly designed rectilinear wideangle produces no distortion (or negligible amounts thereof). This is why it is called rectilinear: straight lines of the subject are rendered as straight lines in the image. This is also why it is impossible to design a rectilinear wideangle with an angle of view of 180° or more. A fisheye must instead introduce geometric distortion in order to project a 180° or more field-of-view onto a flat sensor. This is the same reason why it is impossible to produce an undistorted map of the Earth surface (which is not flat, flatearthers notwithstanding) on a flat piece of paper. A fisheye cannot avoid rendering most straight lines as curves (only straight lines that pass through the center of the image are rendered straight). The thing that makes images produced with super-wideangles visually different from those of lenses of higher focal lengths is their perspective rendering, not the presence or absence of distortion. These lenses emphasize the relative size difference between foreground and background, which has nothing to do with geometric distortion. To lessen the chance of unpleasant perspective rendering, while you gain experience with these lenses, do the following. Once you have enough experience, you will know when to follow these rules, and when to ignore them.
These general rules also apply with fisheye lenses, especially if they will be converted to rectilinear (="defished") in post-processing. Some examples, all at 7mm and f/4: 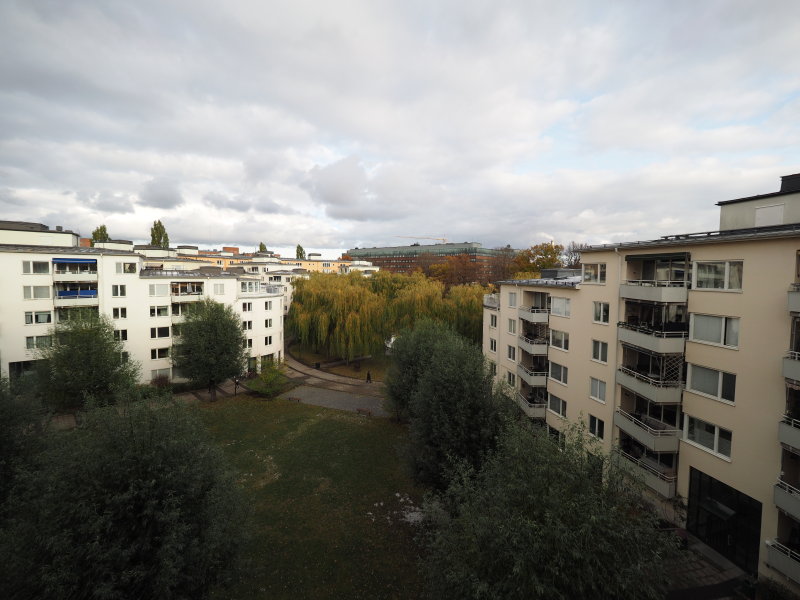
Vertical lines are not truly rendered as vertical, but often you can get away with this amount. 
Prespective rendering caused by the asymmetric cropping of the top vs. bottom portions goes unnoticed. 
Vertical lines are now far from vertical in the picture, and the "extreme wideangle look" is evident near the edges. 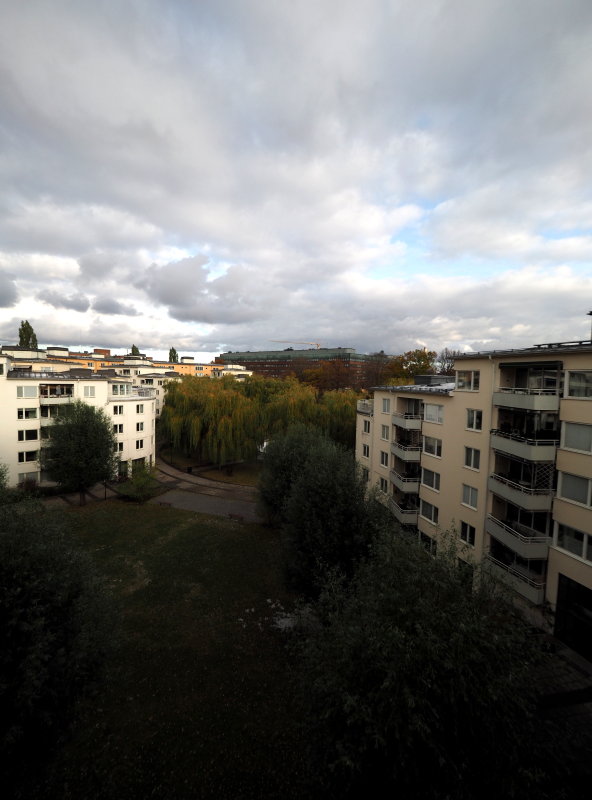
Sky could be cropped away in post-processing if desired. Lens handlingIn spite of its relatively large size, this lens feels well balanced on the E-M1 in a two-hand grip (right hand holding the camera grip and left hand under the lens barrel). It may feel front-heavy on smaller and lighter bodies, especially those without a well-sculptured hand grip. The fixed lens shade makes it unlikely that the front element of the lens will be accidentally touched while handling the camera with normal care. The distance between the focus ring and the front edge of the lens shade is also sufficient to avoid this type of accident. I always use a dedicated Arca-compatible plate on my E-M1 (see above pictures), which slightly changes the way the camera handles. In my case, with the plate I can solidly grip the camera even with my right little finger, which I could not really do without the plate. Especially at 7 mm FL, the front element is sufficiently close to the front of the lens shade (the top of the convex dome of glass is recessed by only about 6 mm) that care must be used to avoid accidental collisions, e.g. in a crowd. If this is a concern, then the lens should be capped whenever not in use. One of the available third-party filter carriers and a filter would also provide a protection against bumping the subject with the front element. I always fasten the neck strap of the camera to the right side of the Arca plate under the camera body, rather than to the right eyelet on the camera. This forces the camera to hang on my chest with the lens pointed downward instead of forward. This has probably spared me from bumping the front element of the lens several times while walking in the field. Keep your fingers away from the edge of the lens shade, lest you include them in the scenery. FlareConsidering that the front element of this lens is broadly exposed to the sun in many outdoor situations, this lens displays relatively little flare. Protecting the front element from direct sunlight with a better lens shade is not practical, and it is up to the photographer to make up for this limitation with technique and attention to where sunlight strikes. In nature and landscape photography, for instance, it is often possible to look for a position where the front lens element is sheltered from the sun by the shadow of a tree branch, or a hand-held sun shade/black card/open hand can be placed just outside the field of view of the lens to project a shadow on the front lens element. In interiors photography, it may be possible to swich off a ceiling lamp, use a black card to shelter the front element from direct illumination, move the camera to a more sheltered position, or temporarily remove a lamp and hand-hold it in a different position. ConclusionsThe Olympus 7-14 mm Pro is the only currently available professional extreme wideangle for Micro 4/3. If f/4 suffices, then the Panasonic 7-14 mm is a cheaper and lighter alternative (although not a professional lens in speed and image quality). At longer focal lengths, especially 12 mm, plenty of alternatives are available, including professional-quality ones. If an extremely wide field of view is more important than image resolution at the edges of the frame, then a fisheye image defished in post-processing is even wider than the Olympus 7-14, but image corners will be blurry even in low-resolution images for the web. |